

Floating Wall Shelves Decorating Ideas
10 No Fail Rules for Styling Small Floating Shelves
Sometimes there's a fine line between styling a shelf and overloading it. I recall one of the pearls of wisdom Coco Channel said, "Before you leave the house, look in the mirror and take at least one thing off." This advice applies perfectly to decorating wall shelves too.
It's especially relevant for small, floating shelves. Their openness doesn't provide much space to hide stuff. And, when you cram too much stuff on an open shelf, you know it right away because it feels heavy and unbalanced.
The rules here apply to any type of floating shelf and they also work for whatever type of design you implement. They work for high contrast, monochromatic, organic, minimal or even maximalist.
In fact, if you're a maximalist, you'll really love these rules because they will give you solid parameters to stick to, so you won't end up with a look that's too heavy or crowded.
If you're struggling with how to decorate a wall shelf or you're looking for ideas for what to put on them, you're gonna love 10 No Fail Rules for Styling Small Floating Shelves.
-
Find Inspiration
When you start to plan out your shelves, do a little inspiration searching online. One of my favorite things to do is to search Google images for inspiration pictures.

Source: Google.com
All you have to do is open up a Google search tab on your phone or computer and type in the search terms you want to see.
Once you start finding pictures that look like what you want to create, copy or snip them into a program like PowerPoint so you can compile a few photos to organize your thoughts. Look at your inspiration pictures and pick out the things that appeal to you.

Source: Live Free Creative, Bethany Nauert, Kim Andre
You can make call out notes to really focus on the things you want to incorporate, or you can just keep the pictures as a reference for an overall look. Either way, save the compilation as a .png file and email yourself a copy to keep on your phone. That way you have a neat little mood board to reference when you're out shopping.

Source: Live Free Creative, Bethany Nauert, Kim Andre

Source: Live Free Creative, Bethany Nauert, Kim Andre
2. Stick to a Color Concept
When you have your inspiration pictures organized, it's time to actually find the items you want to incorporate into your shelf décor.
Start with an anchor piece that will set the color inspiration for the whole concept. A couple of rules to kind in mind:
• Choose colors that appear in your home already. If you have a color theme for the entire house, stick with that.

• Remember, you can always paint things to match your color theme.
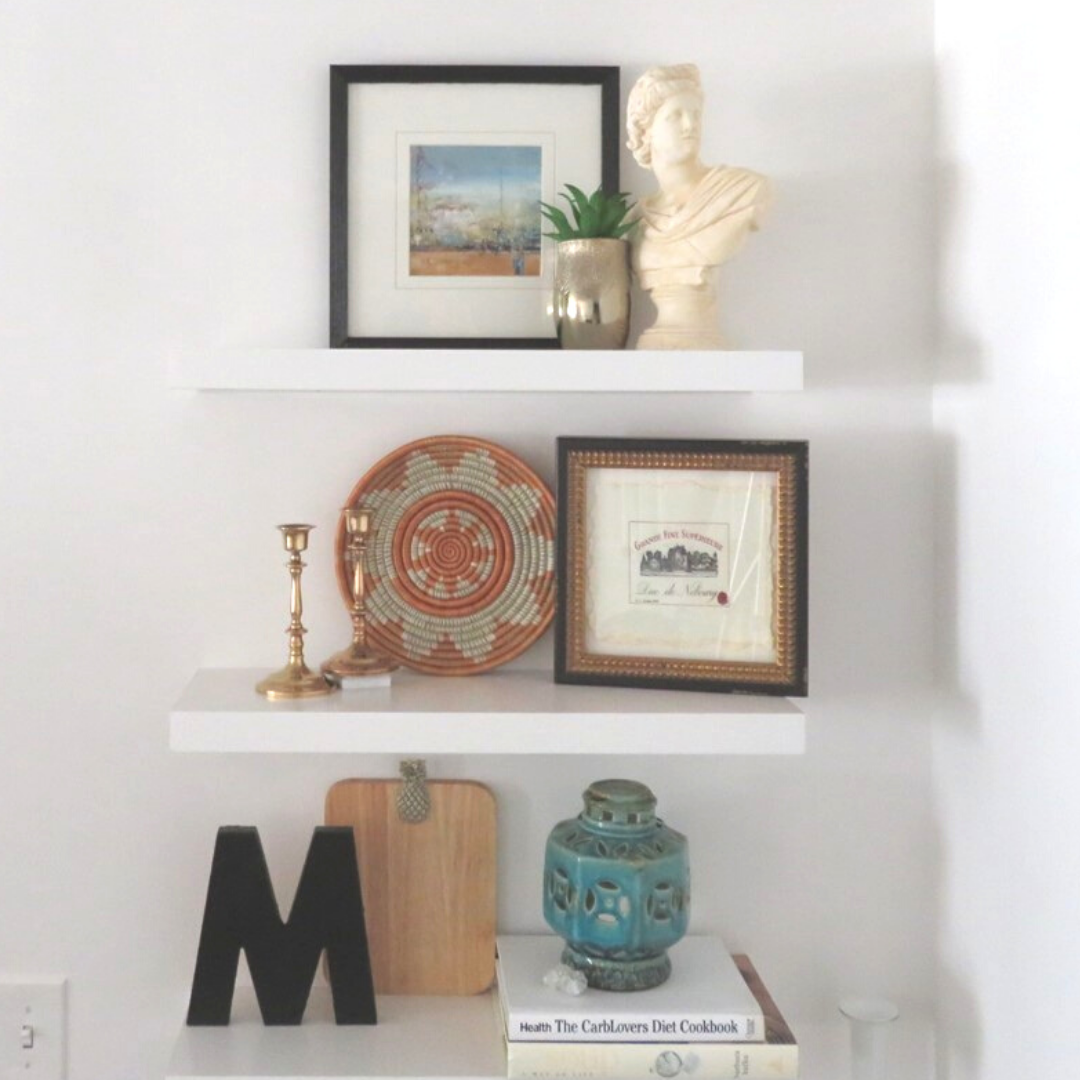
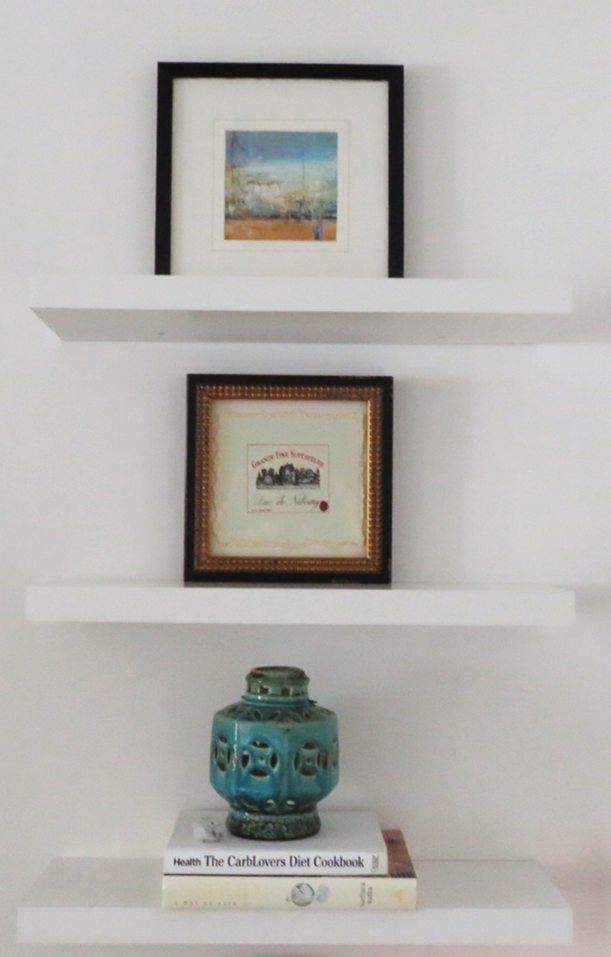
I found this small art print when I was out making the rounds for my shelf décor and I snagged it because it was the exact colors in my house's color theme: watery blues, turquoise, rust orange and a hint of green.
When you find your anchor piece, take a picture of it and go back into your chosen software program and pull the colors that you want to focus on out of the anchor piece.
3. Vary the Height and Line of Items
When you're back from your shopping trip, place all your items on a table and start to figure out where you think you want them on the shelf.
A good place to start to do this is to place the tallest items on the shelves first.

Put one tall item on each shelf.
Try putting the tall items on one side of each shelf and alternate the placement for every other shelf.

Stand back and see how you like it.
If it doesn't feel right to you, try moving the tall item to the middle of one of the shelves and see if that looks better to you.
At this point it's all about getting an idea for placement and it's fine if you fuss with it or move things around. When things click you'll know it because they will feel like they're in the right place.
Remember, you can edit at any point in the process.
4. Layer Items
Next, place a couple more items close to the tall pieces.
Odd numbers look good together but, this is just a suggestion. You may have 4 things that look amazing together and if it feels right, then keep it.

Layering creates depth and that makes things look interesting.
5. Combine Textures
You'll want to switch up the textures on the shelves. Choose items that have a rough texture and combine them with things that are smooth.
Pick a woven texture and combine it with something like glass, pottery or metal.
Different textures create visual interest and that helps to make your collection of things look curated. Personally, I like an eclectic group of items on a shelf but, you can certainly create a very intentional narrative of things on your shelf that "go" together.

Maybe you're a Harry Potter fan and you want to curate a collection of items that come from that series. Maybe you're a Disney fan and you love the Lion King and you want a shelf that represents the items from that story.
No matter what, combining textures and layering your items on the shelves will make everything look great!
6. Embrace Empty Space
Having open areas or spots without anything else is essential for open, floating shelves.
Empty space allows you to focus your gaze on the items on each shelf. When there's too many things crammed on a floating shelf, there's a danger of things getting knocked off and it just looks cluttered.

The same can be said for closed shelves too. Having too many things jumbled together looks chaotic.
Edit your stuff.
A huge collection of tiny things will look overwhelming and you will not be able to enjoy what you have.
Think about putting some of your collectibles away and switching them out for different seasons.
This is a great way to keep your treasures looking and feeling fresh because you'll only see them for brief times and they will be more special feeling. It's like Christmas decorations. I always love to unpack my holiday decorations because I have memories associated with them. I remember where I got them, who gave them to me, etc. It's a wonderful process and the same can be said for any collection of items.
7. Catch the Light with Glass, Pottery or Metals
When you choose items that catch the light, you're able to channel it and reflect it around the room.

This works great when your floating shelves are in a darker corner of the room.
The reflective items like glass, pottery or metals pick up the light and that adds to the dimension and interest of your composition.
It works for reflecting natural light during the day and artificial light at night.
8. Switch Up the Shapes
It's important to have different shapes on your floating shelves. If everything is square and rectangle, your arrangement will feel boxy and boring.
By adding in round shapes, organic shapes or long horizontal shapes, things will look more interesting.
Different shapes highlight individual objects. They empathize difference and that draws your eyes to the details.

If everything was the same shape, it becomes monotonous and dull.
9. Repeat Black
Black brings your eye rest. One of the most used decorating "hacks" is to incorporate hints of black in every room.

This can be in things like drapery hardware, picture frames, kitchen cabinet hardware, dresser drawer pulls, lamps, accessories.
Styling floating shelves is just a microcosm of decorating in general.
Just like incorporating hints of black in your home's décor, placing items with touches of black on floating shelves provides the punctuation.
It's like the period at the end of a sentence. That rest allows you to absorb the color, texture and variation that comes before and after it.
10. Add Plants, Crystals or Wood
If you've read any of my other advice, you'll recognize that I'm a big fan of using plants in my designs.
I don't think there's a room in my portfolio that doesn't have some type of plant.
They're wonderful if you need an organic texture.
They provide ideal natural color and they can add dimension, drama and life to any shelf, vignette or room you put them in.
With open floating shelves, I tend to go a bit more conservative.
Unless I'm going for a plant-centric design, I'll incorporate smaller or more compact plants to my open shelves.

Depending on the size of your shelf, it's best to keep your plants proportional to the other items near it.
Keep in mind how much weight a floating shelf can support. (Some plants, combined with soil, top dressing and the plant themselves, can be quite heavy.) Also make sure you know what kind of natural light your plant of choice prefers. All plants need sunlight, but some are more tolerant to low light than others.
If you're shelf is in a room with no natural light, try incorporating artificial plants. Some of the options on the market look as nice as the real thing and they can be the perfect substation in an area without natural light.
There you have it, 10 No Fail Rules for Styling Small Floating Shelves:
-
Find Inspiration
-
Stick to a Color Concept
-
Vary the Height and Line of Items
-
Layer Items
-
Combine Textures
-
Embrace Empty Space
-
Catch the Light with Glass, Pottery or Metals
-
Switch Up the Shapes
-
Repeat Black.
-
Add Plants, Crystals or Wood.
I'd love to hear which of these tips stuck a chord with you. Will you be using some of them I your own shelf styling designs?
Leave me a comment below and tell me all about it.
Join the Fun!
If you enjoyed this post and you want to keep seeing my weekly blog, the best way to do that is to subscribe.
You can subscribe by downloading my 11 Secrets Only Designers Know to Make Your Space Rock. If you're curious about how decorators and designers make a home look magazine ready, you'll love taking a gander at these 11 secrets. You'll learn how to style your room from the floor up and it will work for ANY space you have.
You can also subscribe by taking my What's Your Decorating DNA? quiz. It's perfect to help you find your predominate decorating style so you can shop with confidence for anything your home needs.
I write about small space design and decorating, sustainable furniture options, positive self care and a variety of do-it-yourself home décor.
I'd love to connect with you!
"This man is a plant shaman. He not only designs beautiful rooms, he's got a green thumb that works like magic! My peace palm never looked better."
"Michael Helped me to get my home office in magazine ready form. Thank you a million times for helping me figure this room out. It's now my favorite room!"
Michael is principle designer and blogger at Michael Helwig Interiors in beautiful Buffalo, New York. Since 2011, he's offered online interior e-design services for small spaces ranging from coaching, product sourcing and full room plans with installation guidance. He is a frequent expert contributor to many National media publications and news outlets on topics related to interior design, home decorating, manifestation and the Law of Attraction. Michael happily shares his experience in the world of home decorating and design to help folks avoid expensive mistakes and decorating disappointments. You can follow him on Pinterest, Instagram and Facebook @interiorsmh.
Floating Wall Shelves Decorating Ideas
Source: https://michaelhelwiginteriors.com/2017-blog/2020/7/10/10-no-fail-rules-for-styling-small-floating-shelves
Posted by: standifermustor.blogspot.com
0 Response to "Floating Wall Shelves Decorating Ideas"
Post a Comment